Saturday, March 16, 2013

The Box That Almost Never Saw The Dawn...

This is an update to a project I described a couple of posts back. The Dawn of a New Box, briefly discusses my first attempt at inlay or intarsia. I also used splined mitered corners for the first time on the project.

My original design and intent was to create opposing rabbets to form the interface between the lid and the box. After constructing the box and gluing everything up I discovered I had thought how I was going to accomplish the inside rabbet on the lid. For about two days I brewed what I thought I knew. and later realized I didn't know, over and over in my mind. No solutions came to mind. I decided to look for help from the online community on a couple of the forums, but I wasn't getting any responses or at least no response in the immediate manner my impatience typically demands. On a whim, I looked on Google+ to see if I could strike up a one on one discussion with someone and low and behold there was Chris Wong from Flair Woodworks. He was very patient and took quite a bit of time to describe a couple of techniques I could use. One option he gave me was to use my wheel marking gauge to slowly cut my shoulders, while using a sharp chisel to pare to the desired depth for the cheek. The second method would utilize my small Dozuki saw to cut kerfs between the shoulder and cheek lines to speed waste removal and limit tearout at the corners. I had choosen the latter as the method I was going to use. Thanks Chris for pointing me in the right direction.

Before I could begin to work the rabbets I was going to need to cut the lid from the fully assembled cubicle box. I had already determined that I was going to cut 3/8" from above the second spline from the top of the lid. and this should have left me with about 3/8" of material to cut the rabbet. I had intended to cut the top off using my bandsaw, but for some reason I have been getting a lot of oscillation in the blade lately so I opted for the tablesaw. So measure twice check, better make three times and as we all know you can only cut it once. BBbbuzzzzzz, one, two, three and finally four sides cut off in seconds. Awesom... Aweful what have I done, there is only about an 1/8" and its not nearly the clean cut I had imagined. I looked for a second and then quickly realized I had measured the 3/8" from the bottom of the first spline instead of the top of the second. Now there is no way I'll be able to cut the rabbets as I originally planned. I wasn't even sure I would be able to clean the surface on the bottom of the lid and top of the box good enough. What a mess. I decided to let it set a couple of days to avoid immediate use as a heat source.

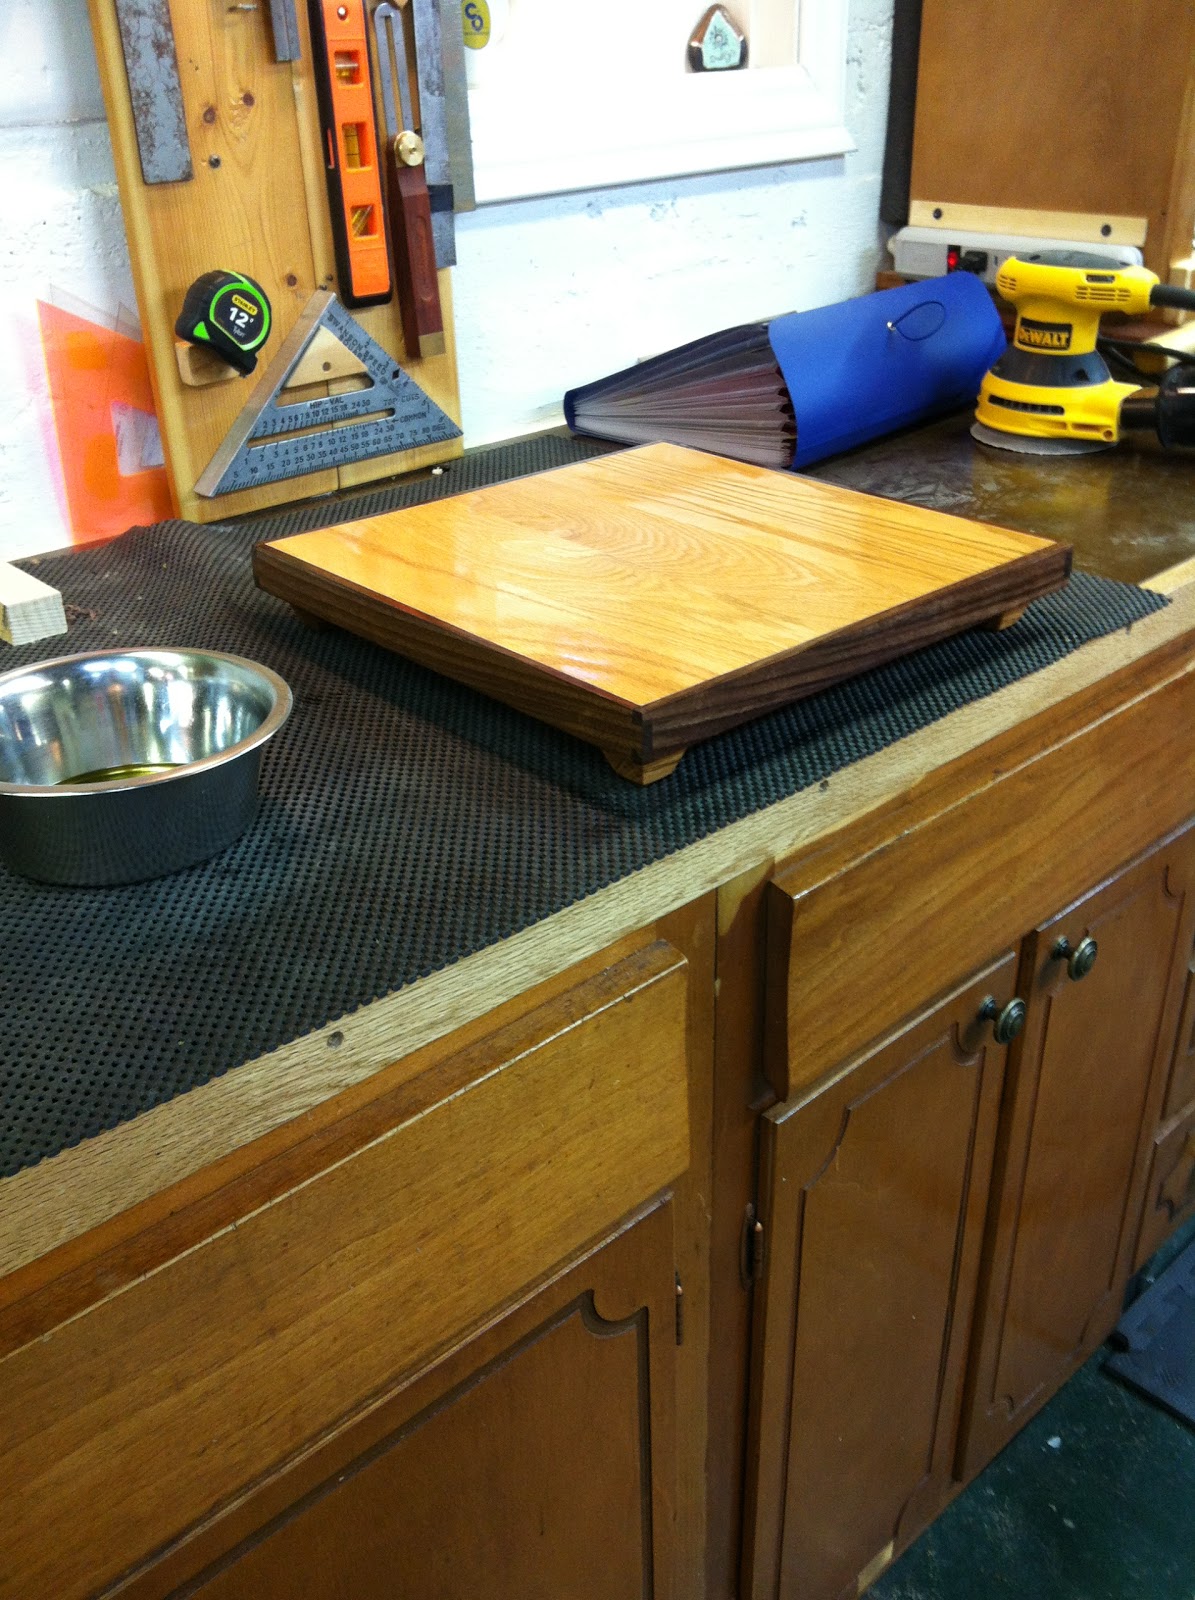
After a day I proceeded to clean up the surfaces and sanded them flat. At this point the lid and box sit nearly flush with one another. There is only about a 1/16" lip left on the lid so I will be gluing in pieces to serve in place of the rabbet. I will post updated pictures over the weekend as I near completion of this little project/learning experience. Thanks for stopping by.

Until my next post:

KEEP YOUR MIND ON YOUR FINGERS AND YOUR FINGERS ON YOUR HANDS…


Friday, March 8, 2013

Finishing Up The Miter Station

This week I have worked to complete the Miter Station project I introduced last week. While I was unsuccessful at completing the project, I feel I made enough progress to post an update on where it stands.

First I have added onto the the dust collection ducting for the station. I incorporated a 4" "Y", 3" reducer and 2" hose connector to the previously discussed piping. Additionally, in order to remedy the whistling I was getting from the 1 1/2" sump hose I discussed in last week's post I installed a 4' segment of 2" diameter flexible swimming pool filter tubing. While the exterior construction of the hose is very similar to the sump hose the interior is smooth walled and eliminates (Thank Goodness) the whistling I experienced from the sump hose. The only issue I experienced from splitting the air flow between the area below the saw and at the dust port on the saw is balancing the air flow to the two locations. My elegant Hillbilly solution was to insert a baffle or restrictor on the upstream end of the "Y". It took about three attempts to make the correct WAG but I eventually got balanced collection from both collection points. The baffle was initially constructed from scrap luan plywood and the second iteration saw the inclusion of infamous duct tape to further restrict the flow. After I decided there still wasn't enough pick up at the saw's dust port and after realizing the duct tape was probably not going to hold up for an extended period I moved to an aluminum flashing material. As I cut the aluminum I used the luan and duct tape version as a template and only slight extended the edges to further restrict the flow. As you'll notice in the pictures below, I cut a semi-circle in the baffle and installed it with the opening towards the bottom of the pipe. In my mind this seemed to serve two purposes; one was it should reduce dust build up on the upstream side of the baffle and two it places the restriction as close to the intersection in the "Y" as possible. In my minds eye the latter should maximize the function of the baffle in directing flow to the smaller diameter piping. I don't know if either of these concepts are correct, but I know the end results seem to support the effort.

The other items I completed included the installtion of the support table fence and the finishing of both the fence and the support table top. The only thing remaining on the wish list is the inclusion of t-track on the fence to use for clamping and permanently attached sliding stop block. I should complete these items in the next week or two.

As for the area behind the support table fence I am currently planning to incorporate some type of storage unit. I haven't decided between installing open shelving, a more formal cabinet, french cleat system or other tool organization system, however I do know it will not be peg board. I am also scratching my head on how to get bench top dust collection to the workbench area immediately adjacent to the miter station. This bench serves many purposes in my shop at this time, including layout, assembly, sanding and finishing operations. In the long range plans, there will be a more formal workbench for layout and most assembly, a spray area for finishing and this bench will be relegated to mostly sanding operations, thereby making the dust collection extremely important at this bench.

Next post I hope to include some shop layout drawings, including future additions and end game strategy for finishing the setup. While I hope to one day be able to convert the existing independent two car garage into my "FINAL" shop. This basement layout needs to be functional for several years before I will even begin to consider the garage conversion. Anyway that post is for another day.

Hope your enjoying these recent posts and more consistent schedule. Thanks for stopping by.

Until my next post:

KEEP YOUR MIND ON YOUR FINGERS AND YOUR FINGERS ON YOUR HANDS…


Saturday, March 2, 2013

Miter Saw Station

Two weeks and two posts, I am nearly positive the internet is about to crash!

Well I just thought I would post a brief entry describing my recent miter saw station build. I still need to complete top and fence on the right side of the station, but for the most part the project is complete. Sorry to say I didn't take as many photos as I initially intended, but you will see a few below.

While I realize this is really only a "HALF" station; it is what I felt would meet the majority of my shop needs and still conserve valuable space in the shop. In the event I would need to utilize the left side for longer stock support I will either use a roller stand or a mobile stand to serve the purpose.

This project consists of 1/8" luan plywood, 23/32" shop grade plywood, construction grade 2x4 lumber, a small piece of curly maple, 3/8" concrete anchors, 3/8" x 3" lag screws, 3/8" x 2" lag screws, 1 1/2" drywall screws, 3/8" brass cabinet screws, 1 3/4" finish nails, Titebond II wood glue, 4" thin walled PVC pipe and a wonderous product called DUCT tape. My wife swears I couldn't fix anything without duct or electrical tape. Honestly she is probably right, but I still regularly argue the point with her, without success. I completing the right side support wing and fence I will probably use some hard maple for both the support and fence and will likely add in a piece of standard t-track to the fence. I haven;t completely decided how I will configure the t-track, be it on the face or top or both, but the intent is to use them for hold downs and stop blocks.

On the the dust collection front I incorporated the 4" thin walled PVC as ducting. I am currently using the Dust Right Quick Connect System and a 20' flex hose to service my stationary. In order to connect the quick connector to the 4" PVC I cut 2 1/8" x 3" kerfs on opposite sides of the PVC pipe and used duct tape to compress the end of the pipe enough to fit the quick connector. I realize there are reducers available to perform the same function, but this method was cheaper and seems to be working just fine. Eventually I will be hard piping most of the shop, so this is a temporary solution anyway. The PVC then goes into the cabinet to a 90° elbow and through the cavity just below the saw. I sloped the inside of the cavity to direct the saw dust down towards the 4" pipe. While I am sure others have better solutions and more efficient systems this works for me and seems to collect 75-80% of the dust that make it to the area just below the saw. I addition to the collection below the saw; I also epoxied plumbing fitting onto the saw itself in order to better direct the dust from the dust port on the saw and to allow ne to connect a flex hose to go to my shop-vac. The shop vac is also temporary until I can add a Y to the 4" PVC and tie the dust port permanently to the dust collector. My only issue with this setup is the flex hose I purchased (sump pump flex line) whistles terribly when I fire up the shop-vac. I am guessing this is caused by the ridges inside the hose, as I can usually twist and bend it the hose to get the whistling to stop temporarily. I will be looking other hose options in the future, but for now it is what it is. Thank God for hearing protection.

So far I am really pleased with the results of the dust collection and this build in general. Once the support table and fence are completed I am confident this addition to the shop will serve me well. As with other recent posts I will provide an update once the project is 100% complete.

Thanks for taking the time to read this post. As always I am very interested in your comments, suggestions and ridicule, so please let me know your thoughts!!!

Until my next post:

KEEP YOUR MIND ON YOUR FINGERS AND YOUR FINGERS ON YOUR HANDS…


Monday, February 25, 2013

The Dawning Of A New Box

OK, so here is the latest project in the WV Woodshed. It is my first attempt at creating an inlay/intarsia type of project. I admit there are more issues than I can count, but hey, its just part of the learning process and daggonit at least I am trying to improve and broaden my horizons.

The project consists of locally cut cherry, curly maple, red oak and walnut. On the exotic side; I've incorporated bubinga and purpleheart just for some additional color. The box will end up approximately 4 1/2" square by 3 1/2" tall. The walls of the box are about 3/8" and the bottom and top are made of 1/8" luan plywood. Originally I was going to keep my stock at 5/8" to 3/4" but the curly maple had other ideas after the initial milling. After seeing the lighter appearance of the 3/8" material I am actully very please the stock had a mind of its own.

Techniques I'm using include splined mitred corner for the box, grooves for the box top and bottom, the previously mentioned inlay/intarsia, a rabbeted lid and for the first time I am using boiled linseed oil (BLO) and shellac for the finish. I have used BLO with poly in the past but never shellac. After finishing the the inside of the box prior to glue up I have to say I could really learn to love shellac. It dries so quickly and secondary coats are very forgiving as the blend right into the initial coat. Nearly all these techniques are 1st attempts for me so I expect some challenges and less than perfect results.

Couple of things I've learned along the way, curly maple is more difficult to smooth and flatten than I actually thought. I do not have very good hand planes and I am not the greatest at sharpening the irons either, so tear out has been a significant problem. Cutting small inlay pieces with a 1/2" resaw blade on my 14" Rikon bandsaw is not ideal either. The advantage of a well tuned scrollsaw for this type of work became immediately obvious as I struggled to cut curves. While I made it through the ordeal unscathed there were a couple of moments where I had to remind myself to; Keep My Mind On My Fingers & My Fingers On My Hands.

So far I've really enjoyed this project and think I will most likely try another similar, all be it more challenging, project in the near future. Below are a few pictures for your snickers and giggles. Please let me know what you think and offer any advice you may have regarding design, materials, techniques or whatever. I will post additional photos once I have completed the project! Thanks!!!

Until my next post:

KEEP YOUR MIND ON YOUR FINGERS AND YOUR FINGERS ON YOUR HANDS…


Thursday, February 7, 2013

Forget The Fear!


Get Woodworking Week 2013 - Tom's Workbench


Paralysis by analysis, fear of failure and cost of repairing mistakes are often used to describe the inability to initiate or follow through on a project. I am plagued with each and every one of these issues on nearly every project I attempt.

My friends and family say I am overly anal about the details and that I am too much of a perfectionist, which I openly admit to the latter. Not that I actually think I can achieve perfection, but more that I worry so much about not even coming close. I tend to sweat and sweat over minor things until a lack of patience overcomes rigor mortis, which usually results in even more mistakes and problems as I tend to rush just to get things done.

Fear of failure creeps in the mind when considering the use of new techniques, new tools or even new materials. Thoughts range from what if I mess the whole project up, lose grain continuity, break/chip/bend this new blade, to any number of possible earth shaking catastrophes. Again I realize the concerns are usually proven to be unfounded, but they still seem to find their way into every project at some level.

Lastly is the concern of escalating costs and ruining perfectly good materials in the pursuit of woodworking nirvana. Personally I find myself nearer to the national poverty level than to the financially solvent side of the ledger. While I am by no means seeking sympathy, it is what drives most of these concerns. When I purchase material to complete a project I need to maximize the ROI and complete the project with as little cost overrun as possible. Number one it is common sense to want to be successful in budgeting a project and secondly my wife is actually quite the accurate marksman, marksperson or markswoman (you choose). This cost consciousness carries over into purchasing of tools, as I tend to excessively review and analyze everything I purchase for the shop. On the plus side I am typically happy with what I acquire; not including the table saw, which was purchased early in my woodworking enlightenment journey.

Bottom-line, I think a lot of people experience these same issues at varying levels throughout their journey and we all learn to overcome them on our own terms. Woodworking is not a simple skill for most of us to learn and trepidation is only a natural part of the experience. This year I am focusing on overcoming these limitations and developing skills to reduce their impact on my projects. I encourage everyone during this “Get Woodworking Week 2013” to push through the thoughts and fears of something that limits their experience and savor the victory.

Until my next post:

KEEP YOUR MIND ON YOUR FINGERS AND YOUR FINGERS ON YOUR HANDS…

Sunday, October 28, 2012

Hunka Hunka Black Walnut

Came across this large chunk of walnut today and couldn't pass it up. It has air dried in a shed for approximately 5-6 years. It is nearly 16BF and measures 4"x12"x48". At only $30 I paid just under $2/BF, so I think I'll be alright.

Now the first thing that popped in my mind is a bench seat. Then came the hall table idea and the twin stools. The original owner had intended it for a rifle or shotgun stock, so the potential is limitless.

Do you have an idea on what it should/could be used to create? Let me know your ideas. I may select a suggestion and document the build on the website.

Until my next post... Keep Your Mind On Your Fingers And Your Fingers On Your Hands!!!


Monday, September 3, 2012

Retirement Presentation Platform...

Thought I should get a quick post in on the project currently on my bench. It's a Retirement Presentation Platform for a display being created by the retirees staff. The retiree is a a Major General (Two Star) in the WV Army National Guard with right at 42 years of service. As a retirement gift his staff has decided to prepare a pair of bronze boots with additional service related memorabilia and mount eveything to this base. Originally, I was asked just to provide a 14"x14" piece of oak, but I decided to add a little embellishent to the final design. As the oak was requested specifically to match the decor of his home office, I used red oak as the primary material and added a small walnut accent, with dovetail corners, for contrast. The other item I added was small feet to raise the piece up and give it a hovering like effect. Away here a few pictures for you. Please review them and let me know what you think. These photes were taken just after the first coat of BLO and you'll notice some the excess hasn't been wiped off yet. Anyway hope you enjoy!

Until my next post,

Keep Your Mind on your Fingers and your Fingers on your Hands!!!